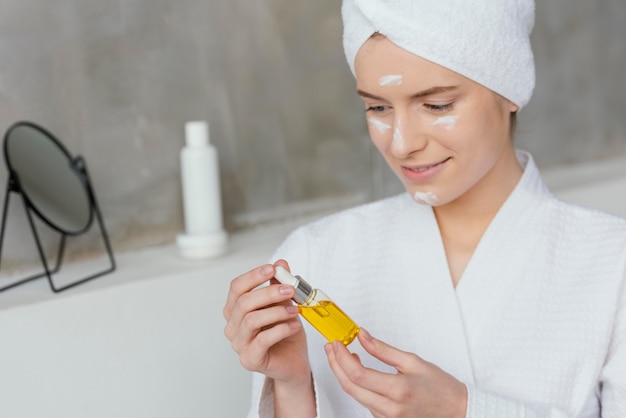
Most of us have been led to believe that using soap-based cleansers is essential for keeping our faces clean. However, the oil cleansing method (OCM)—a new trend in skincare—challenges this idea and suggests the exact opposite approach for deeply cleaning the skin. If you want to address common skin issues without spending a fortune on expensive face washes, oil cleansing might be worth exploring.
Interestingly, many common skin problems can be traced back to the skincare products we rely on. Traditional cleansers, regardless of their price, often leave skin either overly dry or excessively oily over time. That’s because most face washes are made with soap and alkaline ingredients, which strip away the skin’s natural oils. These natural oils serve as a protective barrier, keeping skin soft and safeguarded from harsh environmental factors. When these oils are removed, dry skin becomes even drier, and oily skin produces more oil to compensate, creating a frustrating imbalance.
The Oil Cleansing Method (OCM) takes a completely different route to cleanse your face. It works on the principle that “oil attracts oil,” using oils to dissolve excess sebum, dirt, makeup, and pollutants trapped in your pores. This method is suitable for any skin type, and with consistent use, you’ll start noticing positive changes.
### How the Oil Cleansing Method Works
OCM offers thorough cleansing without the downsides of traditional soaps. Contrary to popular belief, oil doesn’t cause pimples or acne on its own. The real issue arises when dirt and impurities clog pores alongside oil. By using oil to cleanse, you avoid harsh chemicals and maintain your skin’s natural oil balance.
The oils used in OCM gently dissolve hardened oils and debris lodged in the pores. When the clogged oil is broken down, it’s easier to remove dirt and pollutants without affecting the skin’s natural moisture.
For best results, combine oil cleansing with mild steaming. This opens up pores and enhances the deep-cleansing process, making it more effective.
### A Guide to Starting the Oil Cleansing Method
#### Choosing the Right Oils
Before diving into oil cleansing, selecting the right oils is crucial. You’ll need two types of oils: one thick, like castor oil, and a thinner oil to dilute it based on your skin type. Castor oil is a popular choice for OCM because of its ability to dissolve impurities, improve skin texture, and heal the skin. As the lighter oil, you can opt for options like sunflower oil, olive oil, avocado oil, or argan oil—each with unique benefits.
Here’s a quick guide based on skin type:
– **Normal Skin**: Use 20% castor oil with sunflower oil or another lighter oil.
– **Dry Skin**: Limit castor oil to 10%. Combine it with 20% olive oil and 60% avocado oil for a nourishing mixture.
– **Oily Skin**: Increase castor oil to 30% and mix with sunflower or sweet almond oil.
– **Acne-Prone Skin**: A mixture of 20% castor oil, 40% grapeseed oil, and 40% olive or sunflower oil works well.
– **Aging Skin**: For mature skin, use 10% castor oil, 40% avocado oil, 20% argan oil, and 30% evening primrose oil.
#### Preparing the Oil Blend
Mix the chosen oils in the right proportions based on your skin type. This ensures a customized cleanse tailored to your specific needs.
### Steps for Oil Cleansing
1. **Oil Massage**
Start by generously applying the oil blend to your face. Gently massage it in circular, upward motions for 5–8 minutes to ensure the oil penetrates and dissolves impurities. The oil will also easily remove makeup, sunscreen, and other products, including waterproof formulas.
2. **Steam and Wipe**
Soak a soft washcloth in hot water (not scalding) and wring out the excess water. Place the warm cloth over your face, letting the steam open your pores. Once it cools, gently wipe away the oil. If your blend has a higher percentage of castor oil, you may need to repeat this process. The warm cloth helps remove all residual oil and impurities effectively.
3. **Aftercare**
After cleansing, leave your skin untouched for at least 15 minutes. Later, you can apply your usual moisturizer or night cream if needed. Use OCM at night, and the next morning, a simple splash of lukewarm water will refresh your skin.
### Pros and Cons of Oil Cleansing
#### Pros:
– Completely natural, chemical-free, and gentle on the skin.
– Leaves skin soft, hydrated, and radiant with regular use.
– Effectively removes makeup and impurities, eliminating the need for separate products.
– With the right oil blend, it addresses issues like aging, acne, or oil imbalance.
#### Cons:
– Skin may take 1–2 weeks to adjust to the new routine.
– Requires more time and effort than using a regular face wash.
### Common Questions About Oil Cleansing Method
1. **How often should I do OCM?**
You can use OCM 2–3 times a week depending on your skin’s needs. If you want to use it daily, reduce the amount of castor oil in your blend and avoid steaming every day.
2. **Can I include essential oils?**
Yes, but essential oils are potent. Limit them to just one or two drops per blend to avoid irritation.
3. **How long does it take to see results?**
Changes are usually noticeable within 2 weeks, but significant improvements may require 2–3 months of consistent use.
4. **Is OCM safe for all ages?**
Absolutely. Since it’s natural and gentle, anyone can use OCM. Just be cautious about steaming and ensure that none of the oils cause allergies.
By understanding your skin’s needs and crafting the perfect oil blend, the Oil Cleansing Method can become a transformative step in your skincare routine. Whether you’re battling dryness, excess oil, or early signs of aging, this natural method offers a refreshing, science-backed solution.